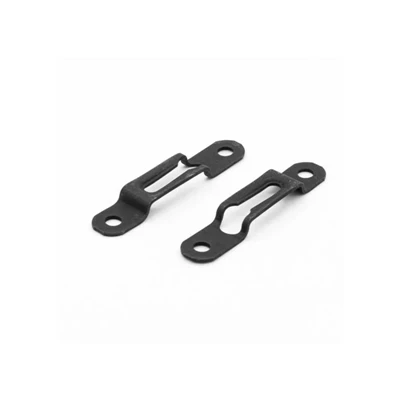

Installing a Crca Sheet Steel Enclosure might seem like a daunting task at first glance, but in reality, it's not as hard as you might think. As a supplier of Crca Sheet Steel Enclosure, I've seen firsthand how these enclosures can offer a great solution for various equipment protection needs. In this blog, I'll break down the installation process and share some tips to make it a breeze.
Understanding Crca Sheet Steel Enclosures
Before we dive into the installation, let's quickly go over what Crca Sheet Steel Enclosures are. CRCA stands for Cold Rolled Close Annealed, and it's a type of steel that's known for its smooth finish, high strength, and excellent formability. These enclosures are used to house electrical equipment, machinery, and other sensitive components, protecting them from dust, moisture, and physical damage.
One of the great things about Crca Sheet Steel Enclosures is their versatility. They come in a variety of sizes and shapes, and can be customized to fit your specific requirements. Whether you need a small enclosure for a single piece of equipment or a large one for an entire control panel, there's a Crca Sheet Steel Enclosure out there for you.
Tools You'll Need
The first step in any installation process is to gather the right tools. For installing a Crca Sheet Steel Enclosure, you'll typically need the following:
- Screwdriver set: Depending on the type of screws used in your enclosure, you'll need a Phillips or flathead screwdriver. Make sure you have a few different sizes on hand to accommodate different screw heads.
- Drill and drill bits: If you need to make holes for mounting brackets or cable entries, a drill and a set of drill bits will come in handy. Choose the appropriate drill bit size based on the diameter of the screws or cables you'll be using.
- Measuring tape: Accurate measurements are crucial for a successful installation. Use a measuring tape to mark the location of the enclosure and ensure it's properly aligned.
- Level: A level will help you make sure the enclosure is installed straight and level. This is especially important if you're mounting the enclosure on a wall.
- Wrench: You might need a wrench to tighten nuts and bolts during the installation process. Make sure you have the right size wrench for the job.
Preparing the Installation Site
Once you have your tools ready, it's time to prepare the installation site. Here are some steps to follow:
- Choose the right location: Select a location that's easily accessible and provides adequate ventilation for the equipment inside the enclosure. Avoid areas that are prone to flooding, excessive heat, or direct sunlight.
- Clean the surface: Use a clean cloth to wipe down the surface where you'll be mounting the enclosure. This will remove any dust, dirt, or debris that could interfere with the installation.
- Mark the mounting holes: Use a measuring tape and a pencil to mark the location of the mounting holes on the surface. Make sure the marks are accurate and evenly spaced.
- Drill the holes: If you're mounting the enclosure on a wall or a panel, use a drill to make holes at the marked locations. Make sure the holes are the right size for the screws or bolts you'll be using.
Installing the Enclosure
Now that the installation site is prepared, it's time to install the enclosure. Here's how to do it:


- Position the enclosure: Carefully lift the enclosure and place it over the mounting holes. Make sure the holes in the enclosure align with the holes in the surface.
- Insert the screws or bolts: Insert the screws or bolts through the holes in the enclosure and into the holes in the surface. Use a screwdriver or a wrench to tighten them securely.
- Check the alignment: Use a level to check if the enclosure is level and straight. If it's not, adjust the screws or bolts until it's properly aligned.
- Secure the enclosure: Once the enclosure is level and aligned, tighten the screws or bolts further to ensure it's securely attached to the surface.
Adding Accessories
After installing the enclosure, you might want to add some accessories to enhance its functionality. Here are some common accessories and how to install them:
- Mounting brackets: If you need to mount the enclosure on a wall or a panel, you can use mounting brackets. Simply attach the brackets to the enclosure using screws or bolts, and then mount the brackets to the surface.
- Cable glands: Cable glands are used to seal the holes where cables enter and exit the enclosure. To install a cable gland, insert the gland into the hole in the enclosure and tighten the nut on the outside.
- Ventilation fans: If the equipment inside the enclosure generates a lot of heat, you might need to install ventilation fans to keep it cool. Follow the manufacturer's instructions to install the fans and connect them to a power source.
Tips for a Successful Installation
Here are some tips to help you install your Crca Sheet Steel Enclosure quickly and easily:
- Read the instructions: Before you start the installation, make sure you read the manufacturer's instructions carefully. This will help you understand the process and avoid any mistakes.
- Take your time: Don't rush the installation process. Take your time to measure, mark, and drill the holes accurately. This will ensure that the enclosure is installed correctly and securely.
- Ask for help: If you're not sure how to install the enclosure or if you encounter any problems, don't hesitate to ask for help. You can contact the manufacturer's customer support team or a professional installer for assistance.
- Test the equipment: Once the enclosure is installed, test the equipment inside to make sure it's working properly. This will help you identify any issues early on and make any necessary adjustments.
Conclusion
As you can see, installing a Crca Sheet Steel Enclosure is not as difficult as it might seem. With the right tools, a little bit of patience, and some basic knowledge of installation techniques, you can have your enclosure up and running in no time.
If you're in the market for a Crca Sheet Steel Enclosure, or if you have any questions about installation or customization, feel free to reach out. We're here to help you find the perfect solution for your needs. Whether you need a standard enclosure or Non - standard Sheet Metal Parts, we've got you covered. We also offer Prototype Sheet Metal Parts for those who need to test their designs before full - scale production. And if you're looking for large enclosures, our Large Sheet Metal Enclosures are a great option. For equipment - specific enclosures, check out our Equipment Sheet Metal Enclosure range.
Contact us to discuss your requirements and start the procurement process. We're eager to work with you and provide the best products and service in the industry.
References
- Manufacturer's installation guides for Crca Sheet Steel Enclosures
- General knowledge of sheet metal installation techniques